You're In Brookelynn: shop
Showing posts with label shop. Show all posts

Intimate DIY Valentines Day Gift Basket feat. K-Y® Love and Target!

This shop has been compensated by Collective Bias, Inc. and its advertiser. All opinions are mine alone. #LoveOurVDay #CollectiveBias

Hey everyone! Today I'm partnering with K-Y® Love and Target to give you some DIY inspiration for Valentine's Day! My boyfriend Skylar and I have been together for almost 5 years, but I still struggle with picking out the perfect V-Day gift. I'm a practical gift giver- I like giving gifts that the recipient will not only like, but actually use! So, I thought it would be fun to throw together a little gift basket for a 'DIY Date Night,' if you will. Fun, right? Plus, I know it's something Skylar will love, if ya know what I mean ;) 

Supplies:

-K-Y® Love Pleasure Gel
- Candy of your choice
- Fun boxers
- A $5 movie
-Popcorn
-Candles
-A handwritten note


First, decide what items to put in your 'Date Night' basket. I decided on a 'movie night' type theme, with some popcorn and a $5 movie from Target. This is great because it's so easy to personalize! I also included some cute boxers for him and candles with scents he likes.

Some other ideas of things to include may be: a bottle of wine with two wine glasses, 


Next, if you want to make your gift more intimate and romantic, you can include something fun for the bedroom. Skylar and I are pretty open about this kind of thing, so when I was given the chance include these K-Y® Love pleasure gels in my gift, I was pretty excited about it!  I was sent two K-Y® Love products to try out and include in my basket- the Passion and Sensuality pleasure gels, which are being sold exclusively at Target for Valentine's Day, found in the feminine care aisle. (They are also offering 10% off these K-Y® Love products via Cartwheel until Valentine's Day!)


Finally, construct your basket! The Target dollar section is the best place to pick up some finishing touches like baskets, ribbons, and tissue paper. I'd love to get a piece of red ribbon and thread it around the basket with a bow in the front. What do you think?

And viola, the basket is done-I can't wait to give it to him! I have a few other ideas of things to include before the night comes, like some wine and maybe some pretty undergarments for myself :) 

Do you have anything fun planned for Valentine's Day?

Back to School All Day Beauty Makeup Tutorial with Neutrogena and Target!

This shop has been compensated by Collective Bias, Inc. and its advertiser. However, all opinions are mine alone. #AllDayLook #CollectiveBias

Hi guys! I'm super excited to be working with Neutrogena and Target today to share with you an awesome makeup tutorial for back-to-school! For all you students out there (or if you're just a busy bee!), I know how important it is to have a go-to makeup look that you apply in the morning, and will last all day. That's what I'll be sharing with you today!


I swung by Target and was able to pick up all of the products I needed for this tutorial (which I scored on sale by the way, via Cartwheel!). I always get sucked into Target's cosmetics & beauty department, and I always seem to find something I need to bring home with me, haha! Also, Target stores will be hosting a Beauty Concierge Event, for specialized and personalized info on beauty and makeup. Event begins August 24th, Limited quantities available. Check with your local Target store for Beauty Concierge day and times.

All Day Beauty Tutorial
This tutorial will show you how to achieve a natural, easy look that will stay in place all day!

Step 1: Prime & Foundation
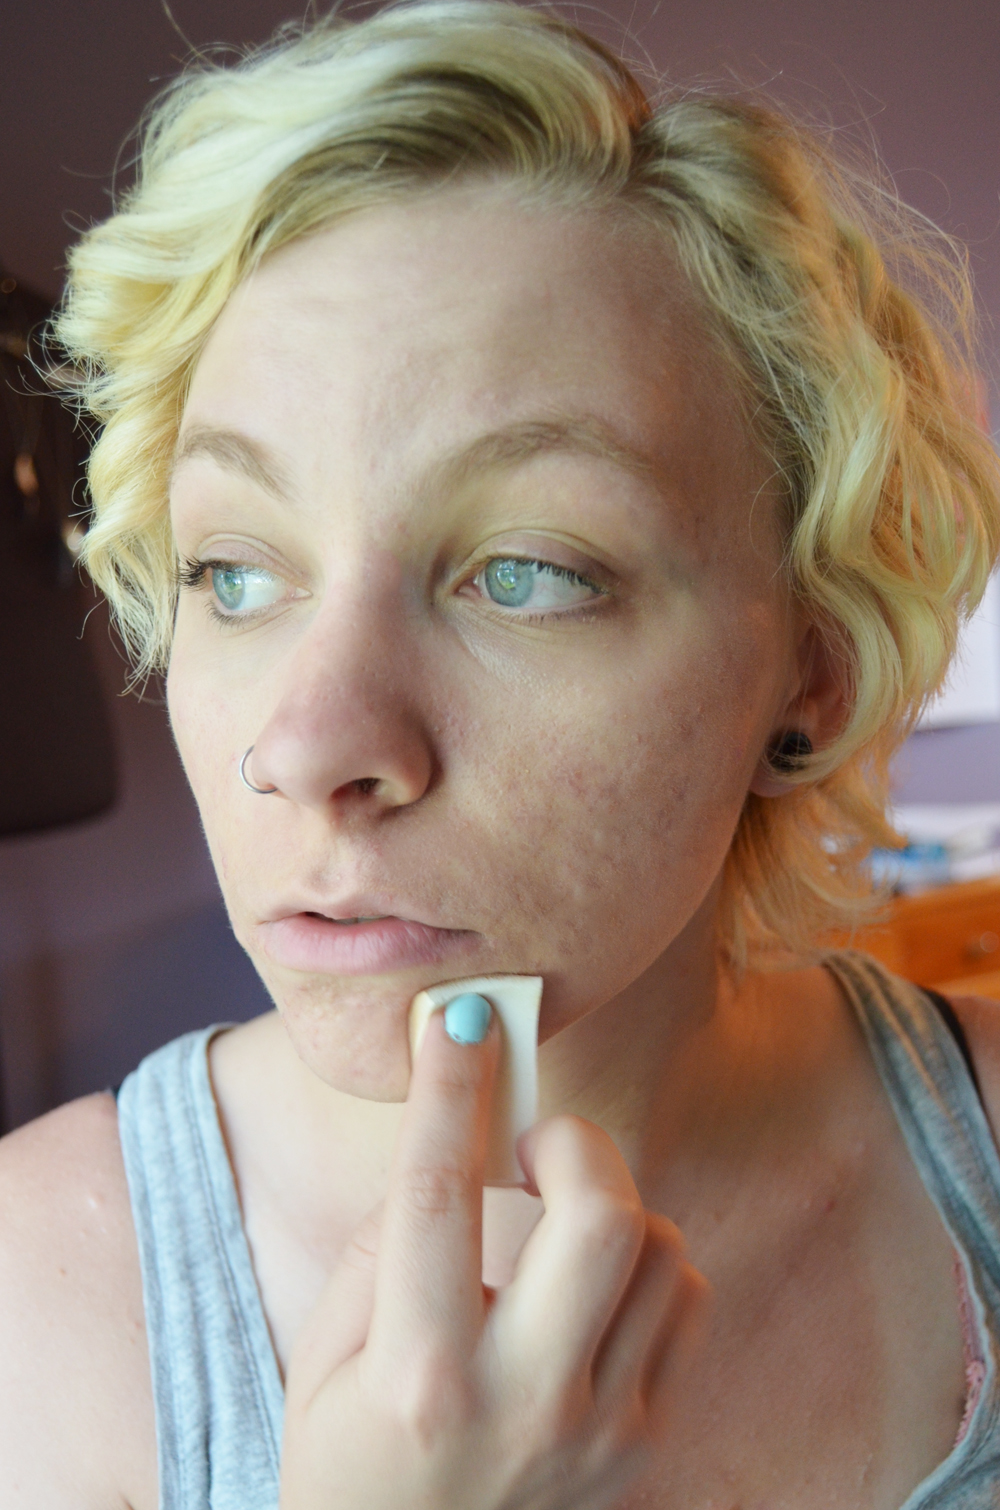
One of the best ways to make sure your makeup stays all day is to start with a clean slate. Before applying any makeup, make sure your face is clean & moisturized! Once you're ready, apply your liquid foundation with a sponge to your face & neck, being sure to blend throughout into your hairline & jawline.

Step 2: Concealer & Blush
After concealing any trouble spots, make sure to sponge on an extra layer of foundation to set the spot. Next, apply a light, neutral blush to the apples of your cheeks.

Step 3: Eyeshadow
Choose a few of your favorite neutral eyeshadows. Here, I chose some shimmer-y browns. For a natural smokey eye look, put the lightest shade on the inner corner of your eyes, the middle shade on the majority of the lids, and the darkest shade in the crease.

Step 4: Eyeliner & Mascara
Next, apply eyeliner along your top lash line, starting thin towards the inner corner, and thickening out the line towards the outer corner. For more definition, you could also apply a small amount of the eyeliner onto the outer corners of the bottom lash line. Finish off with 2-3 coats of mascara.

Step 5: Lips
Apply your lip color; here I used the Moisture Smooth Color Stick in Fresh Papaya.

Step 6: Finish

Finish off with some shine-control finishing powder, and you're ready to go!


Thanks for reading! What's your go-to all-day beauty look?

Spring Retro Makeup Look Tutorial Featuring Rimmel & A Coty/Rimmel Sweepstakes!

I am a member of the Collective Bias®  Social Fabric® Community.  This shop has been compensated as part of a social shopper amplification for Collective Bias and its advertiser. However, all opinions stated are my own. At You're In Brookelynn, I only work with sponsors that I support and use myself.


Hello everyone! Today, I've got a super exciting makeup look to share with you, sponsored by one of my favorite makeup brands, Rimmel, though #CollectiveBias! Rimmel is one of my favorite brands for #BeautyInspiration, and drugstore foundation and mascara, which I will be highlighting today! As you can see below, today I'll be using Rimmel Stay Matte foundation and (my favorite!) Rimmel ScandalEyes Retro Glam Mascara which I picked up from Walmart. (Plus, stay tuned until the end of the post for your chance to enter to win over $50 of Rimmel products!)


Today I'll be showing you how to do one of my favorite looks for spring- a fresh retro look! I am definitely into pinks for spring- especially on cheeks and lips! So today's tutorial will show you how to mix the perfect cat-eye with fresh pinks for your lips and cheeks. Let's get started!

Spring Retro Makeup Tutorial

First, start with your Rimmel Stay Matte Foundation and apply with a makeup brush or sponge. I was extremely happy with this foundation- it truly does stay matte all day!


Next, apply your blush to the apples of your cheeks. I like to take some extra foundation on a sponge and blend after applying the blush, to make it look more natural.


Next step- the cat eye! There are many different ways to achieve the cat-eye look. Typically, I simply start with a thin line starting about 1/4th in from your tear duct, and gradually build on it until you get your desired thickness.


Next, apply your Rimmel ScandalEyes Retro Glam Mascara! Let me tell you, I've been loyal to the same brand of mascara for years, and this has converted me! (I might go into that in another post). Apply two liberal coats to the top lashes, and one to the bottom lashes.


And finally, finish it off with some pink lipstick!


And there you have it! I am absolutely in love with this look, it has become my go-to for this season. This would be a great look for prom, weddings, or even a fun date-night!

Sweepstakes
And now onto the most exciting part- your chance to enter the Coty/Rimmel Sweepstakes! Below you can enter to win a gift basket filled with $50 worth of popular Rimmel products. Plus, there will be 25 winners selected! Good luck!

NO PURCHASE NECESSARY. The Coty® Rimmel® Giveaway starts at 4/2/14 at 12:00 A.M. (midnight) ET and ends on 4/25/14 at 11:59:59 PM ET. Open only to (i) members of the Social Fabric community, (ii) legal residents of the fifty (50) United States, the District of Columbia, and (iii) who are at least 18 years old at the time of entry. Click here for Official Rules and details including how to enter, entry criteria, prizes and restrictions, etc. Void in PR and where prohibited. Sponsor: Collective Bias, Inc.

Also, 2014 is Rimmel's 180th anniversary! To celebrate, make sure to check your Sunday paper for a $1 off coupon for Rimmel's Stay Matte Foundation and their ScandalEyes Mascara! 
Thanks for reading! What's your favorite look for spring?

Black Friday 2013 Fashion Trends, Tips, and Tricks

Note: I am a member of the Collective Bias® Social Fabric® Community. This shop has been compensated as part of a social shopper insights study for Collective Bias and their client. At You're In Brookelynn, I only work with brands I support, and all opinions stated are my own.

If you're like me, black friday is basically like it's own holiday. What's better than a day designated for shopping and finding great deals? Today I'm partnering with Sears, #ThisisStyle, and #cbias to show you some of the fall fashion trends you should look for on Black Friday, and some tips if you're planning on shopping in-store!

Trends to hunt for:

Graphic Sweaters
Black Friday 2013 Trend #ThisisStyle #shop #cbias
1 // 2 // 3 
Leather
Black Friday 2013 Trend #ThisisStyle #shop #cbias

1 // 2 // 3 // 4

Peacoats
Black Friday 2013 Trend #ThisisStyle #shop #cbias
1 // 2 // 3

Ankle Boots
Black Friday 2013 Trend #ThisisStyle #shop #cbias
1 // 2 // 3 // 4

Chunky Knits
Black Friday 2013 Trend #ThisisStyle #shop #cbias
1 // 2 // 3 // 4


Tips for Shopping on Black Friday:

  1. Plan Ahead. Look through store circulars, advertisements, and online for what sales each store will be having. Make a list of stores you'd like to shop at, and note what time they will be starting their sales. Will they be starting Thanksgiving night, or early Friday morning? What time will they be opening their doors? This is important to know!
  2. Create a schedule. Make a list of the stores you will go to, and in what order. Make sure to factor in times they open, and proximity to the other stores on your list. Also, don't forget to schedule in a starbucks or food run! Theres nothing worse than shopping on an empty stomach.
  3. Make a list of must-haves for every store. This will make it super easy to get though the crowds of people who are indecisive. It can even be helpful to go to this store a few days beforehand to know where the items you want to buy may be located. This will save you so much time (to do more shopping, of course).
  4. Be prepared for crowds. Kind of a no-brainer, but be prepared for large crowds and long lines. Try and be civil to everyone around you, and don't push! No one wants a stampede a-la 'tickle-me-elmo.'
  5. Wear comfortable shoes. Like I said, there will be long lines and lots of standing, especially if you are waiting to get into a store before they open. Do yourself a favor and wear comfy shoes! No one will be judging you, I promise. Along those lines...
  6. Dress for the weather. If you're shopping at a strip mall, be prepared to wait outside before a store opens. Know what the weather will be like, and dress accordingly! No one else in line wants to hear you complain about how cold it is when you are only wearing a hoodie. 
  7. Take advantage of reward programs to maximize your savings. Lots of stores have member's rewards programs to help you save even more! I used Sears' Shop Your Way Rewards Program for extra savings!

Make sure to check out the Sears Style blog for more trends and tips, and check out this pintrest board for more ideas!

Do you plan on Black Friday Shopping? What are your must-have trends and must-follow tips?

New Favorite Perfume: Justin Beiber's Girlfriend #scentsavings

Note: I am a member of the Collective Bias® Social Fabric® Community. This shop has been compensated as part of a social shopper insights study for Collective Bias and their client. At You're In Brookelynn, I only work with brands I support, and all opinions stated are my own.
#shop
Okay, so I know most of you are rolling your eyes already, and thinking "wow, Justin Bieber, really?" Trust me, I did the same thing at first. But I'm not gonna lie: this stuff smells awesome. And I'm not just saying that because this is a sponsored post. I would never lie to you, people. I promise.
shop
 #shop
Anyways, after buying this perfume I was definitely curious as to what it would smell like. It has more of a sweet, floral scent, which I love. I feel like most perfumes that are 'floral' scented always smell like my great aunt (you know what I'm talking about), but this is way more youthful. 
#shop
I bought this at Walmart, and honestly, I was super surprised at how low the prices on perfume were! Usually when I look at perfume at department stores, I scoff at how ridiculous the prices are. $70 for perfume? Hell naw. At Walmart though, I scored this for only $20! 
#shop
I hope you all have a lovely Thursday! What's your favorite perfume?

New Camera Part 1: the Samsung WB200 Smart Camera!


*I am a member of the Collective Bias®  Social Fabric® Community.  This shop has been compensated as part of a social shopper insights study for Collective Bias and their client. At You're In Brookelynn, I only work with brands I support, and all opinions stated are my own.  

This past week I have been going crazy in the electronics department; I now have 2 new cameras! And today I will be talking about my new point-and-shoot, the Samsung WB200! Although I love my DSLR (and will be discussing my new one in the coming week!), sometimes it's nice to have a point-and-shoot on hand when you don't want to carry around something big and bulky. I was a bit weary, since I am a loyal Nikon user, but let me tell you, this camera is great. It's a "Smart Camera," which I didn't even know existed until now, but dang it's so cool! It has a touch-screen (great for focusing!) with Wi-Fi Direct, meaning you can send your pictures right to facebook (or where ever else).

It's great, because I feel like Skylar always rolls his eyes at me when I get out my big DSLR all the time to take photos of random stuff, so this is definitely more 'inconspicuous' I guess haha. He even came with me to buy it! If you're interested in our shopping excursion, you can see some ridiculous pictures here.

Here's some photos that I've taken with it:
"Facebook Pic!"

Most of these photos were taken at my family reunion that just happened this weekend, expect to see more pictures soon :) At a family reunion, it's not weird (well, as weird) to be wielding 3 different cameras at once, so I was excited I got to try out both my new cameras at once without anyone really judging me, haha.

Also, check out Samsung's Twitter and Facebook for more information on their cameras :)

Natural makeup looks for summer: a tutorial featuring Rimmel makeup!

*I am a member of the Collective Bias®  Social Fabric® Community.  This shop has been compensated as part of a social shopper insights study for Collective Bias and their client. At You're In Brookelynn, I only work with brands I support, and all opinions stated are my own.   

For me, wearing makeup in the summer can be hard. I want to look cute, but I don't want it to look like I have a caked-on face either! Thankfully, the latest summer makeup trend has been a natural makeup look, which I am totally digging! Today, I'll be partnering with Rimmel makeup and Walmart to show you how to create your own natural makeup look for summer! Also, all of these products are currently on sale at Walmart for $3.97, making them super affordable!


Products used:
Rimmel London Clean Finish Matte Foundation in Soft Ivory
Rimmel Stay Matte Pressed Powder in Transparent
Rimmel Natural Bronzer in Sunlight
Rimmel Glam Eyes Quad Eyeshadow in Sun Safari
Rimmel ScandalEyes Waterproof Kohl Eyeliner
Rimmel Stay Glossy Lip Gloss in Diamond Dust

The Tutorial:

-First, apply the Clean Finish Matte foundation using a makeup sponge, dabbing onto your face and neck. I really like that this foundation is matte, because I have very oily, acne prone skin. It's perfect for keeping shine under control in the warmer weather!

-Next, sweep some bronzer onto cheeks, forehead, and nose. This gives your face some subtle definition, while also giving you a natural looking tan.

 
-Apply translucent powder with a big brush over the whole face, to set the bronzer and foundation. This also helps control shine!


-Now, onto your eyes! I chose a palate of browns, which perfectly compliments the 'natural' look we are going for. Use an eyeliner brush to sweep the middle colors (1&2) onto your whole eyelid. Use the darker color (3) in your crease, and the lightest color (4) on the inside corner of your eye, as well as under your brow bone.

-Add a few sweeps of mascara. Finally, finish off with a swipe of the waterproof eyeliner on your upper lashes, and also a hint on the outside corners of the bottom lashes.

-Don't forget some lip gloss!

And there you have it! For more summer looks, check out the Live SoFab digital magazine! You can also find more summer looks featuring Rimmel in the magazine as well.


DIY textured Summer Nails with Sally Hansen! #Iheartmynailart


Summer is finally here, and that means bright colors, duh! So when I was given the opportunity to partner with Sally Hansen and their new textured nail polishes to create a fun summer mani, I couldn't resist! I had seen these new textured polishes at Walgreens before, and they are so cool! As you can see here, I picked the Fuzzy Coat, but they also have a Sugar Coat which is super cool as well. Even better, at Walgreens you can mix and match BOGO any Insta-Dry, Sugar Coat, Fuzzy Coat, Xtreme Polishes, and Nail Art Pens until 6/29!

This will not be helping my nail polish addiction. Also, see more of my shopping experience here!

And without further ado, onto the tutorial! I'm in love with glitter ombre nails, so I thought it would be fun to do with this new Fuzzy Coat instead!

DIY Textured Ombre Nails

What You'll Need:
Sally Hansen Fuzzy Coat Polish (Mine is in Peach Fuzz)
Base Coat Color (I used Sally Hansen Xtreme Wear in Sunkissed)
Makeup Sponge


  • First, paint your nails the desired base color, then let dry completely.
  • Grab your makeup sponge, and dab a little bit of the Fuzz Coat onto a corner of the sponge.
  • Then, dab it on to the nail, concentrating at the tip. 
  • Once you put on a first coat of the fuzzy polish, wait for it to dry and repeat the process with the makeup sponge.
  • Let dry and apply a top coat.

There you have it! Make sure to check out the #Iheartmynailart campaign, where you can enter your own designs for a chance to win some great prizes!


 Are any of you planning on doing fun summer manis or entering in the contest? If you do I'd love to see the final resuls! Hope you have a lovely day :)

I am a member of the Collective Bias®  Social Fabric® Community.  This shop has been compensated as part of a social shopper insights study for Collective Bias and their client. I only work with brands I support, and all opinions stated are my own.